Update Xenserver hotfix
Customers should use either XenCenter or the XenServer Command Line Interface (CLI) to install updates. When the installation is complete, restart the server for the update to take effect. As with any software update, back up your data before applying this hotfix. Citrix recommends updating all hosts within a pool sequentially. Upgrading of hosts should be scheduled to minimize the amount of time the pool runs in a “mixed state” where some hosts are upgraded and some are not. Running a mixed pool of updated and non-updated hosts for general operation is not supported.
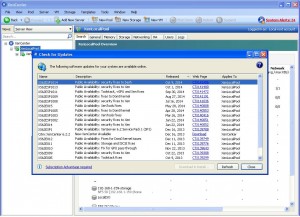
how to update xenserver patches? Download the XML document from http://updates.xensource.com/XenServer/updates.xml to get the information about the XenServer Versions, details of all the patches available and also to get the list of patches available per XenServer version.
Installing the update by using XenCenter
Download the update to a known location on a computer that has XenCenter installed.
In XenCenter, on the Tools menu, select Install Update. The Install Update wizard appears.
Click Next to start the Wizard.
Click Add to upload a new update.
Browse to the location where you downloaded the hotfix, select it and then click Open.
From the list of updates select XS62ESP1014.xsupdate and then click Next.
Select the hosts to which you want to apply the hotfix and then click Next.
Follow the recommendations to resolve any upgrade prechecks and then click Next.
Choose how to perform post-update tasks. In the Post update options section, select automatically or manually, and then click Install update.
When the installation process is complete, click Finish to exit the wizard.
Installing the update by using the xe Command Line Interface
Login your Xenserver host as root
Before download your hotfix zip file to your xenserver, please make sure you have enough disk space on /root partition. Because xenserver default having only 4.0G / partition.
Download the update files
[root@xen1 ~]#wget http://downloadns.citrix.com.edgesuite.net/9708/XS62ESP1014.zip
Extract the xsupdate file from the zip and Upload the xsupdate file
[root@xen1 ~]# unzip XS62ESP1014.zipArchive: XS62ESP1014.zip
inflating: XS62ESP1014.xsupdate
inflating: XS62ESP1014-src-pkgs.tar.bz2 [root@xen1 ~]# xe patch-upload file-name=XS62ESP1014.xsupdate
4fc82e62-b938-407d-a2c6-68c8922f3ec2
Apply the hotfix to all hosts in the pool, specifying the UUID of the hotfix: [root@xen1 ~]# xe patch-pool-apply uuid=4fc82e62-b938-407d-a2c6-68c8922f3ec2
if you will apply patch only on host server then update the following command with patch upload file UUID and hostserver UUID. [root@xen1 ~]# xe patch-apply host-uuid=a1275000-e30f-454b-b1b4-0f082af4b43a uuid=4fc82e62-b938-407d-a2c6-68c8922f3ec2
The hotfix is applied to all hosts in the pool, but does not take effect until each host restarts. For each host, migrate the VMs that you wish to keep running, and shut down the remaining VMs before restarting the host.
Restart xenserver hosts.
or
If you want to run VMs and restart xapi service then Restart Toolstack
The Restart Toolstack option allows you to restart the XenServer management toolstack (also known as xapi). This toolstack controls VM lifecycle operations, host and VM networking, VM storage, user authentication, and allows the management of XenServer resource pools. xapi provides the publicly documented XenAPI Management Interface which is used by all tools that manage VMs and resource pools.
[root@xen1 ~]# xe-toolstack-restartExecuting xe-toolstack-restart
Stopping xapi: [ OK ] Stopping the v6 licensing daemon: [ OK ] Stopping the memory ballooning daemon: [ OK ] Stopping perfmon: [ OK ] Stopping the xenopsd daemon: [ OK ] Stopping XCP RRDD plugin xcp-rrdd-iostat: [ OK ] Stopping XCP RRDD plugin xcp-rrdd-squeezed: [ OK ] Stopping XCP RRDD plugin xcp-rrdd-xenpm: [ OK ] Stopping XCP RRDD plugin xcp-rrdd-gpumon: [ OK ] Stopping the XCP RRDD daemon: [ OK ] Stopping the XCP networking daemon: [ OK ] Stopping the fork/exec daemon: [ OK ] Starting the fork/exec daemon: [ OK ] Starting the XCP networking daemon: . [ OK ] Starting the XCP RRDD daemon: [ OK ] Starting XCP RRDD plugin xcp-rrdd-gpumon: [ OK ] Starting XCP RRDD plugin xcp-rrdd-iostat: [ OK ] Starting XCP RRDD plugin xcp-rrdd-squeezed: [ OK ] Starting XCP RRDD plugin xcp-rrdd-xenpm: [ OK ] Starting the xenopsd daemon: [ OK ] Starting perfmon: [ OK ] Starting the memory ballooning daemon: [ OK ] Starting the v6 licensing daemon: [ OK ] Starting xapi: OK [ OK ] done.

