What is SAML?
Security Assertion Markup Language (SAML) is an XML-based, open-standard data format for exchanging authentication and authorization data between parties, in particular, between an Identity Provider (IdP) and a Service Provider (SP). SAML 2.0 is the industry standard way to federated identity management based on Single Sign-On (SSO). SSO is a session or user authentication process that permits a user to enter the same name and password to access multiple web applications.
Identity Providers and Service Providers
A service provider is responsible for providing services to the end user.
An identity provider (IdP), on the other hand, is a company or organization that is responsible for authenticating users and managing their identities. In other words, an IdP is a provider of identity and authentication services, while an SP is a specific service provider.
Amazon Cognito enables simple, secure user authentication, authorization, and user management for web and mobile apps. With Cognito, a user or visitor can sign in with a username and password through Amazon, or through a third party like Facebook, Google, or Apple.
Thus, with Cognito, a developer can:
- Easily add user sign-up, sign-in, and access control to their apps with its built-in user interface (UI) and easy configuration
- Federate identities from social identity providers
- Synchronize data across multiple devices and applications
- Provide secure access to other AWS services from their app by defining roles and mapping users to different roles
How to setup AWS cognito for IDCS SAML 2.0 IdP SSO authentication
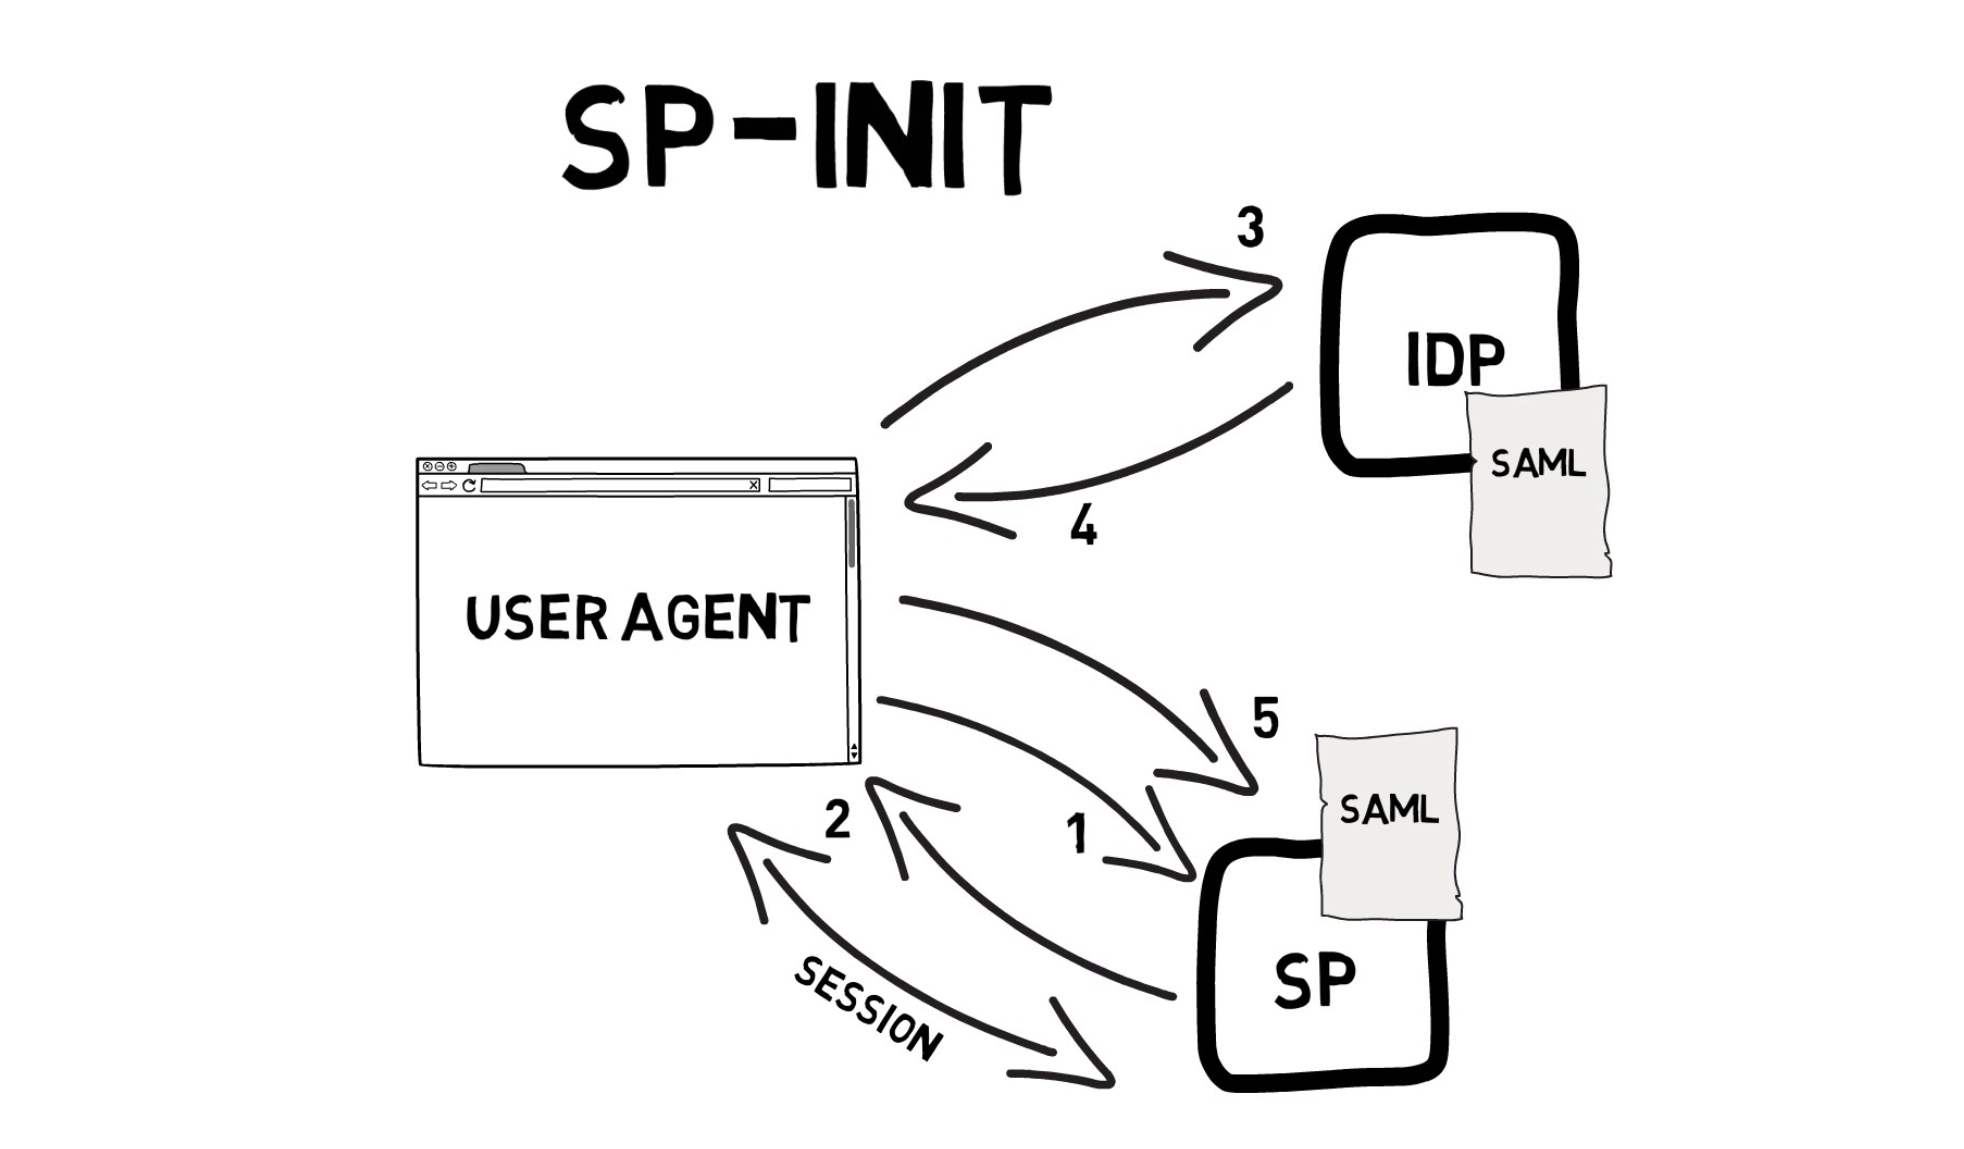
Federating the AWS Cognito with IDCS as the identity provider, The below diagram will explain to you the Service Provider initiated SAML 2.0 assertion SSO configuration.
Login to your AWS account and go to Cognito service.
Create a new user pool
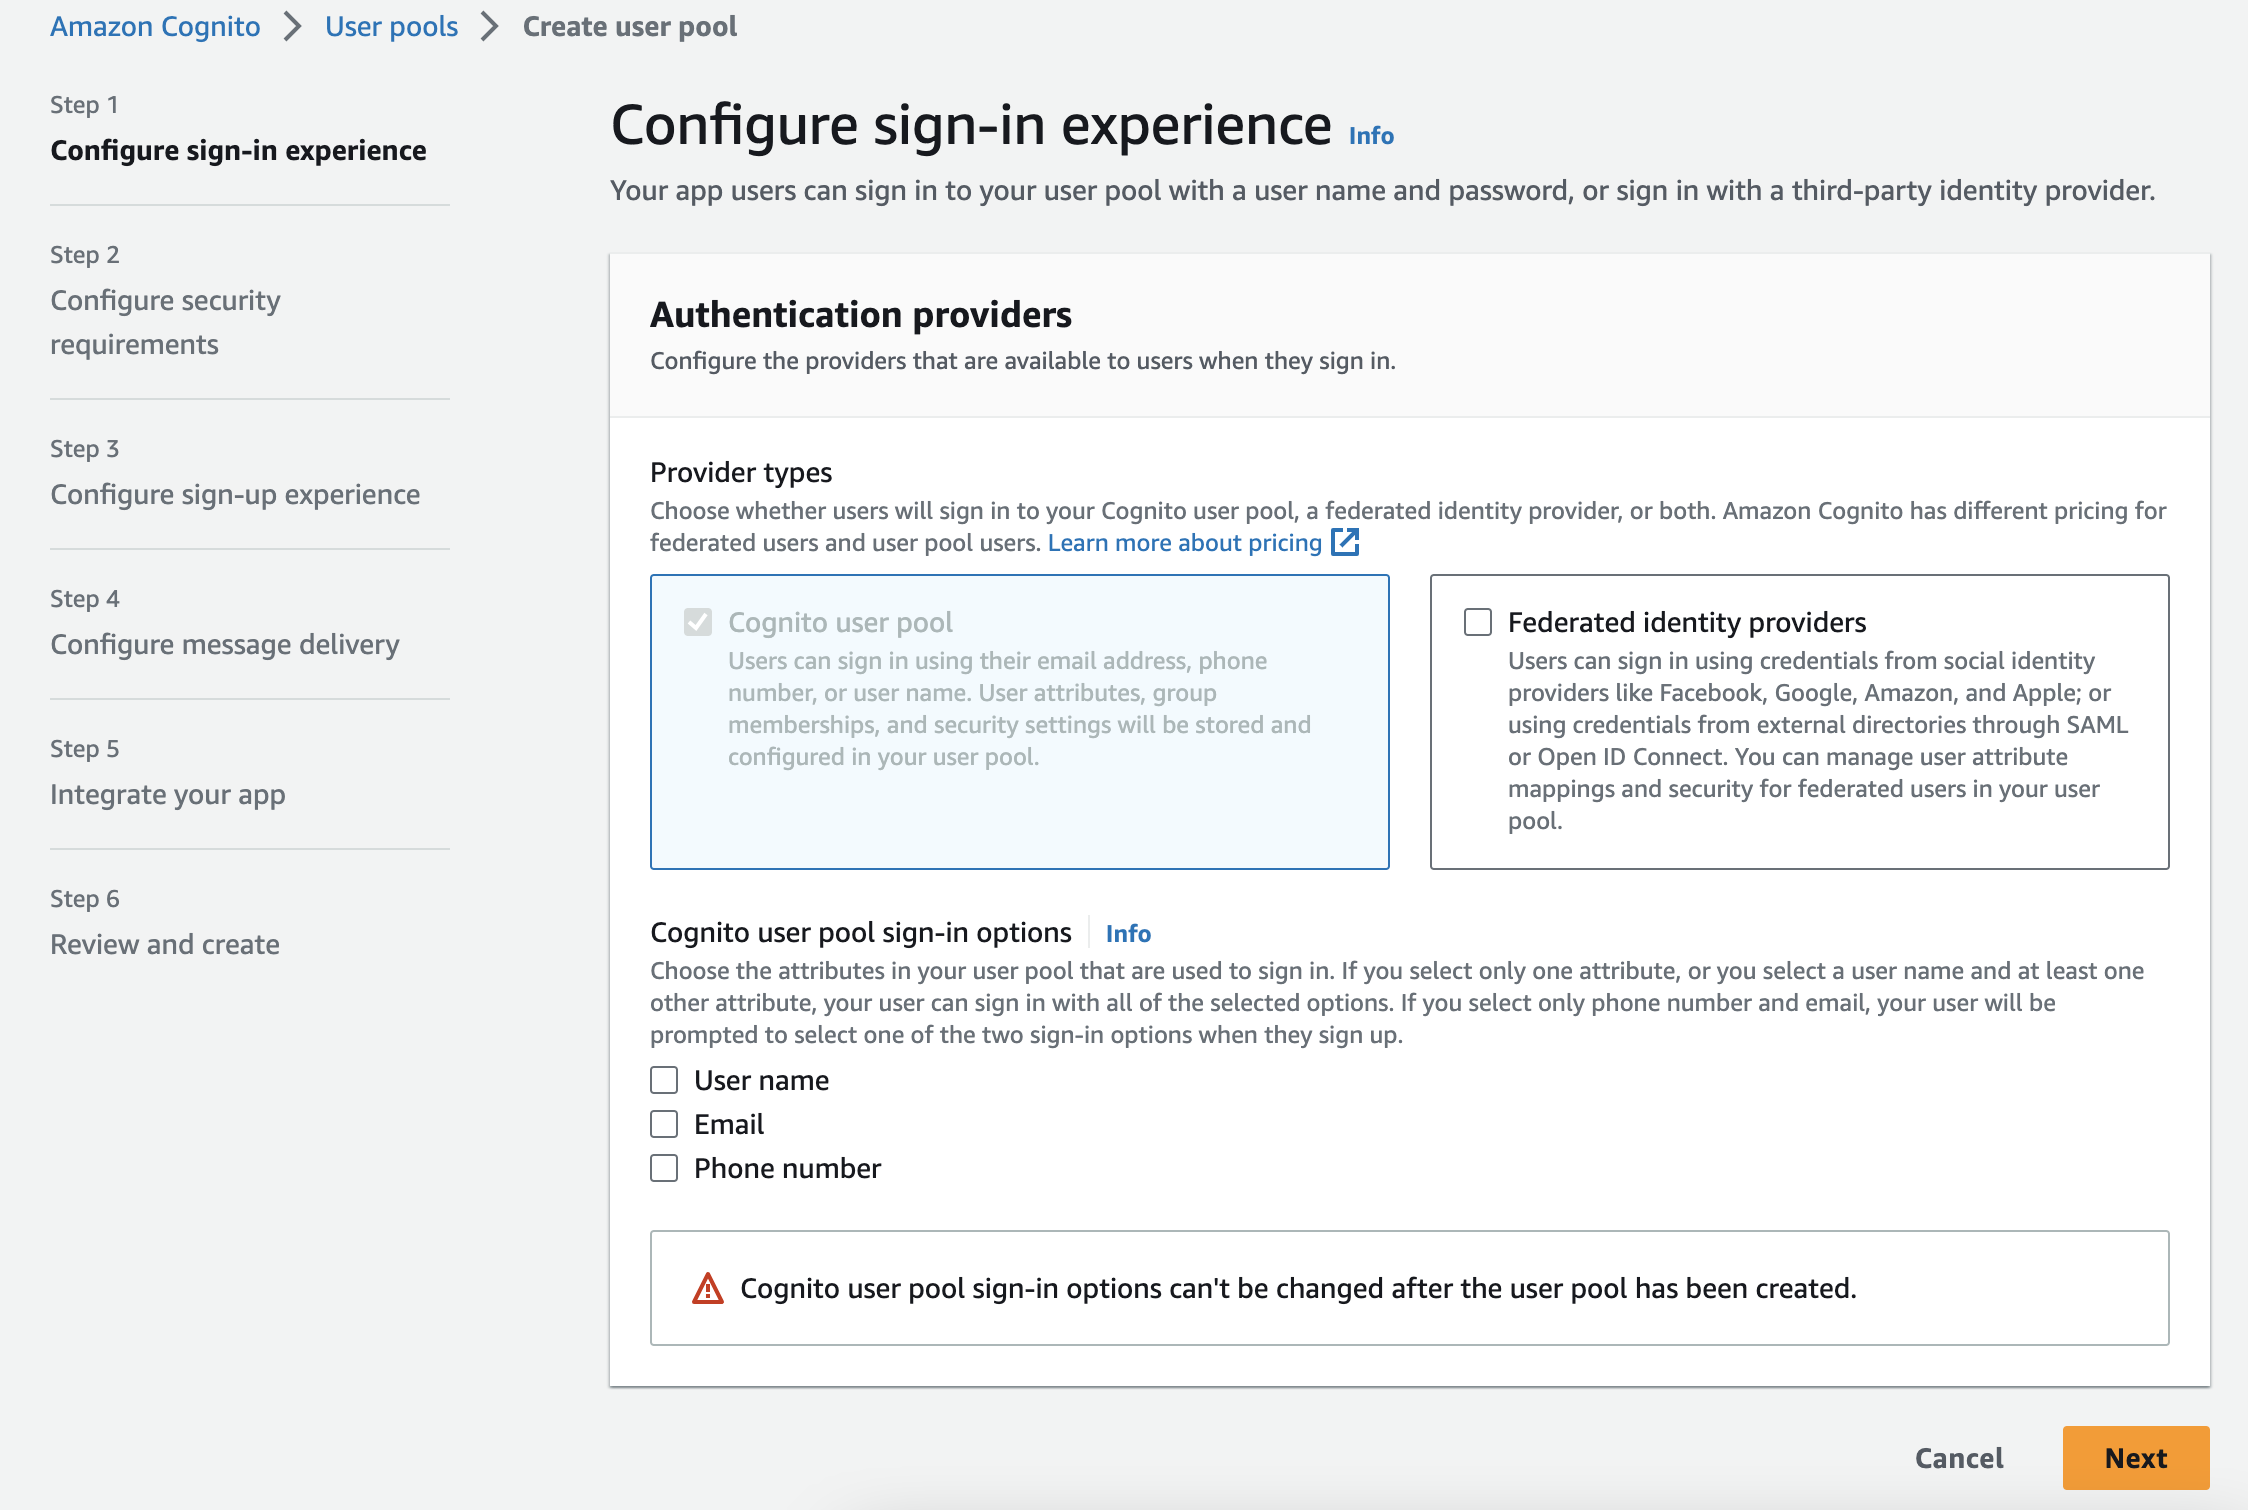
- Click User pools -> Create user pool
- Cognito user pool ( Later once we generate the Idp metadata, we will enable Federated identify providers)
- Cognito user pool sign-in options
- Check Email (The attributes in your user pool that are used to sign in.)
- Click Next
- Cognito defaults (use default password policy)
- Multi-factor authentication (MFA Recommended but if you want, go with No MFA)
- Click Next ( leave all the default options)
- Click Next
- Click Next
- Update User pool name (Your user pool name can’t be changed once this user pool is created.)
- App client name ( Update your Application client name, in this case IDC provider to this setup)
- Click Next and Review all the settings.
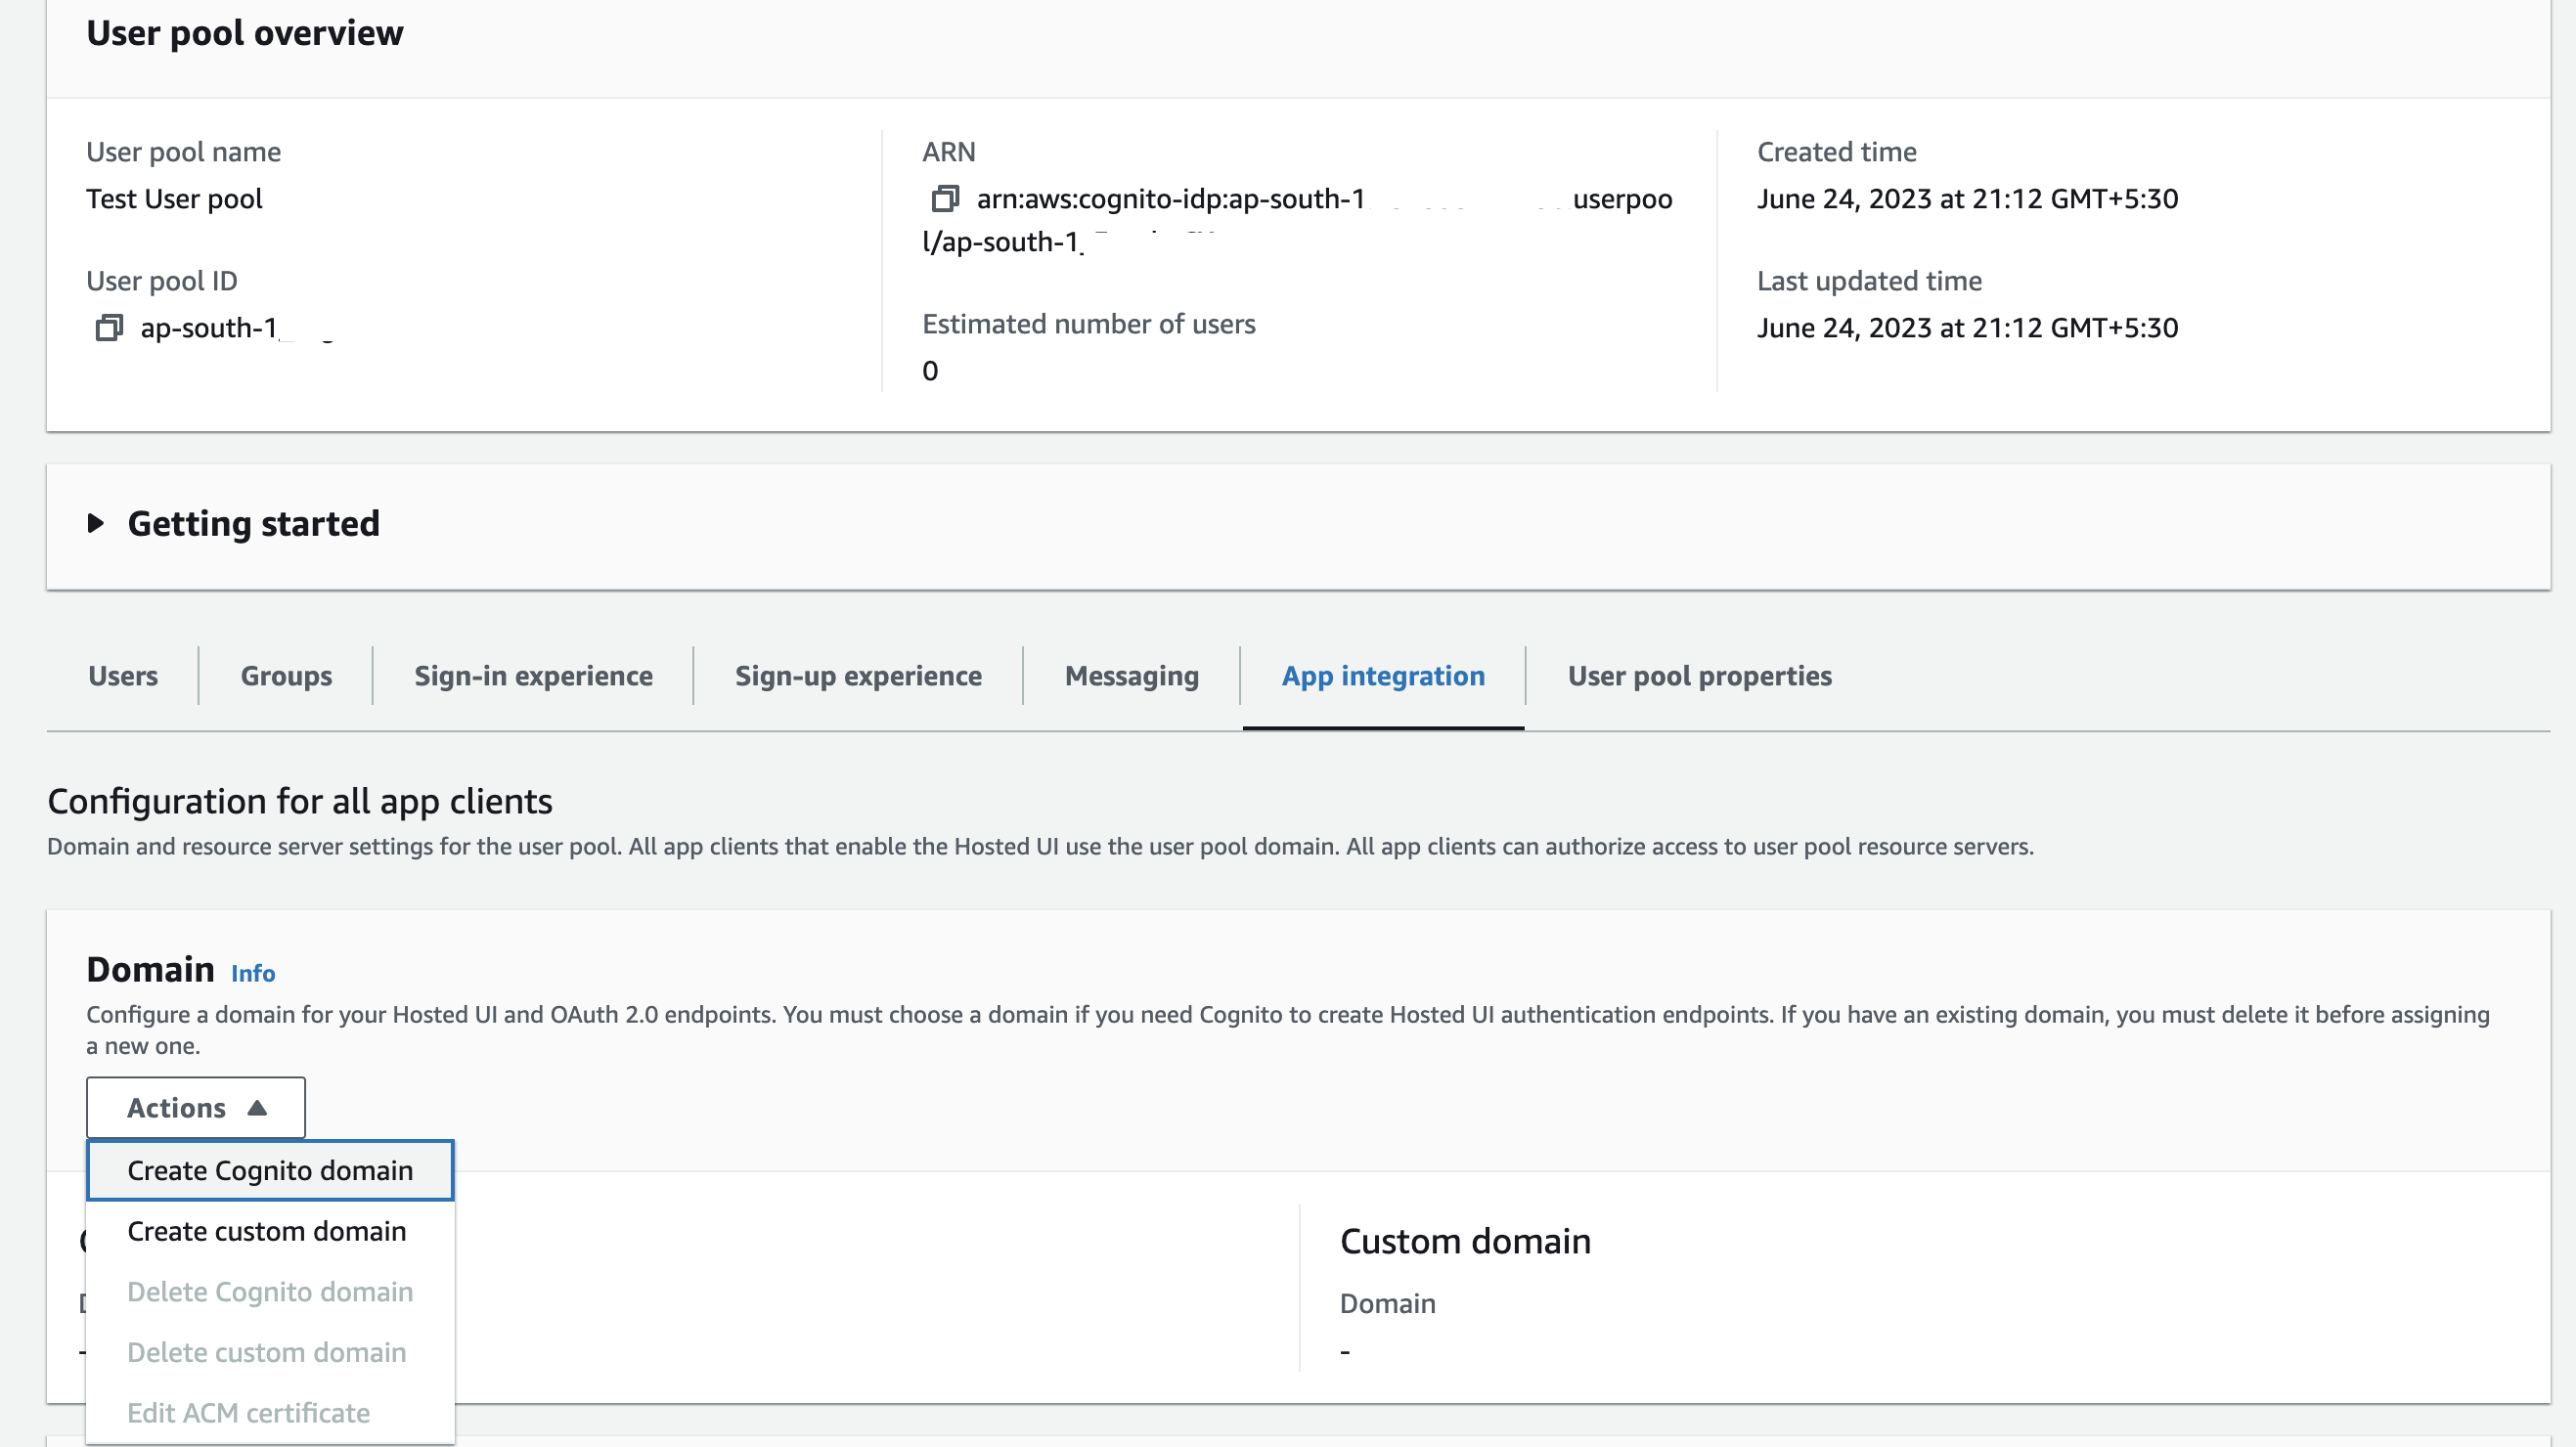
Create Cognito domain
- Click User pool
- Click App integration
- Domain -> Create Cognito domain
- Click App integration
Download signing certificate
- Click User pool
- Sign-in experience
- View signing certificate and Click Download
- Sign-in experience
Provide Entity ID, Assertion consumer URL to the IDC identity service provider.
Entity ID – urn:amazon:cognito:sp:You can find your user pool ID on the General settings tab in the Amazon Cognito console.
Assertion Consumer URL Format – https://.auth..amazoncognito.com/saml2/idpresponse
Copy the Cognito domain that is generated above steps and update the above format.
Signing certificate – Use the signing certificate downloaded and saved in the above steps.
Add SAML service provider application in IDCS
- Login to the IDCS Admin console and navigate to Applications -> Add a new application
- In the Add Application window click on SAML Application to create a new application

- In the App Details section provide values as per the following instructions

- In the Name field, enter your Application Name (say Prolaborate).
- In the Description field, enter fewer characters to provide a description of your Prolaborate.
- Click Upload to add an icon for your Prolaborate application.
- Click on Add
SSO Configuration Tab
Click on SSO Configuration Tab to define SSO attributes.
- General section of the SSO Configuration

In the General section of the SSO Configuration page, define the following:
- Fill ‘Entity ID’ and ‘Assertion Consumer URL’ fields from AWS cognito Service Provider Configuration
- NameID Format: Select the type of format to use Email address. The service provider and the identity provider use this format to easily identify a subject during their communication.
- NameID Value: Select the NameID Value as Primary Email to identify the user that is logged in.
- Signing Certificate: Upload the .cer certificate file that is downloaded before from AWS Cognito for SAML assertion.
Attribute Configuration section of the SSO Configuration
Attribute Configuration: Expand Attribute Configuration on the SSO Configuration page to add user-specific and group-specific attributes to the SAML assertion. Click on plus(+) symbol to add the attributes.

Enter the Attribute Configuration details and Click on Save.
Download Identity Provider Metadata: Click on Download Identity Provider Metadata( keep it in your local, we need to upload this metadata to the AWS Cognito)

Click on Activate to activate the application.
Click on Users tab in your Oracle Account to assign the user
- Click on Assign Users button.
- Select the users to whom to give access and Click Ok.
Upload Identity Provider Metadata to AWS Cognito.
Go to AWS -> Cognito
- Click your User pool
- Click Sign-in experience
- Add identity provider
- Click SAML
- Enter your Provider name
- Upload metadata document (upload your Identity Provider Metadata XML file which was downloaded earlier from IDCS)
- User pool attribute -> SAML attribute (email). We already updated the email attribute in the IDCS SSO configurations.
- Click Add identity provider
- Click SAML
You have updated all the settings. Now, Goto App Integration in the User pool.
- App client name -> Click your application
- Hosted UI (You should confirm Identity providers section is selected with the SAML 2.0)
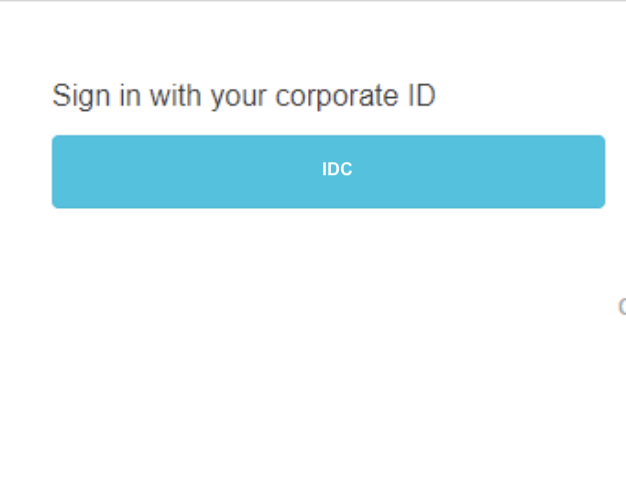
- View Hosted UI
You will get redirected to IDP login page for a challenge
Enter the email ID and password of the user in IDCS. After you are authenticated in IDCS successfully, you will be redirected to the protected page of your application.


