A site-to-site VPN allows you to connect multiple fixed locations to establish secure connections with each other over a public network. The below setup has configured the Site-to-site IPsec VPN tunnel configuration between AWS and the on-premises datacenter in the Palo Alto firewall.
The below setup is available to configure AWS Site-to-Site VPN Step by Step and the detailed documentation.
Prerequisites:
- Ensure you have the necessary licenses for IPSec VPN on your Palo Alto Networks firewall.
- You must have a virtual private cloud (VPC) in AWS with an IP-CIDR that doesn’t overlap with the on-premise network. This VPC must be associated with a virtual private gateway (VGW) or attached to a transit gateway (TGW).
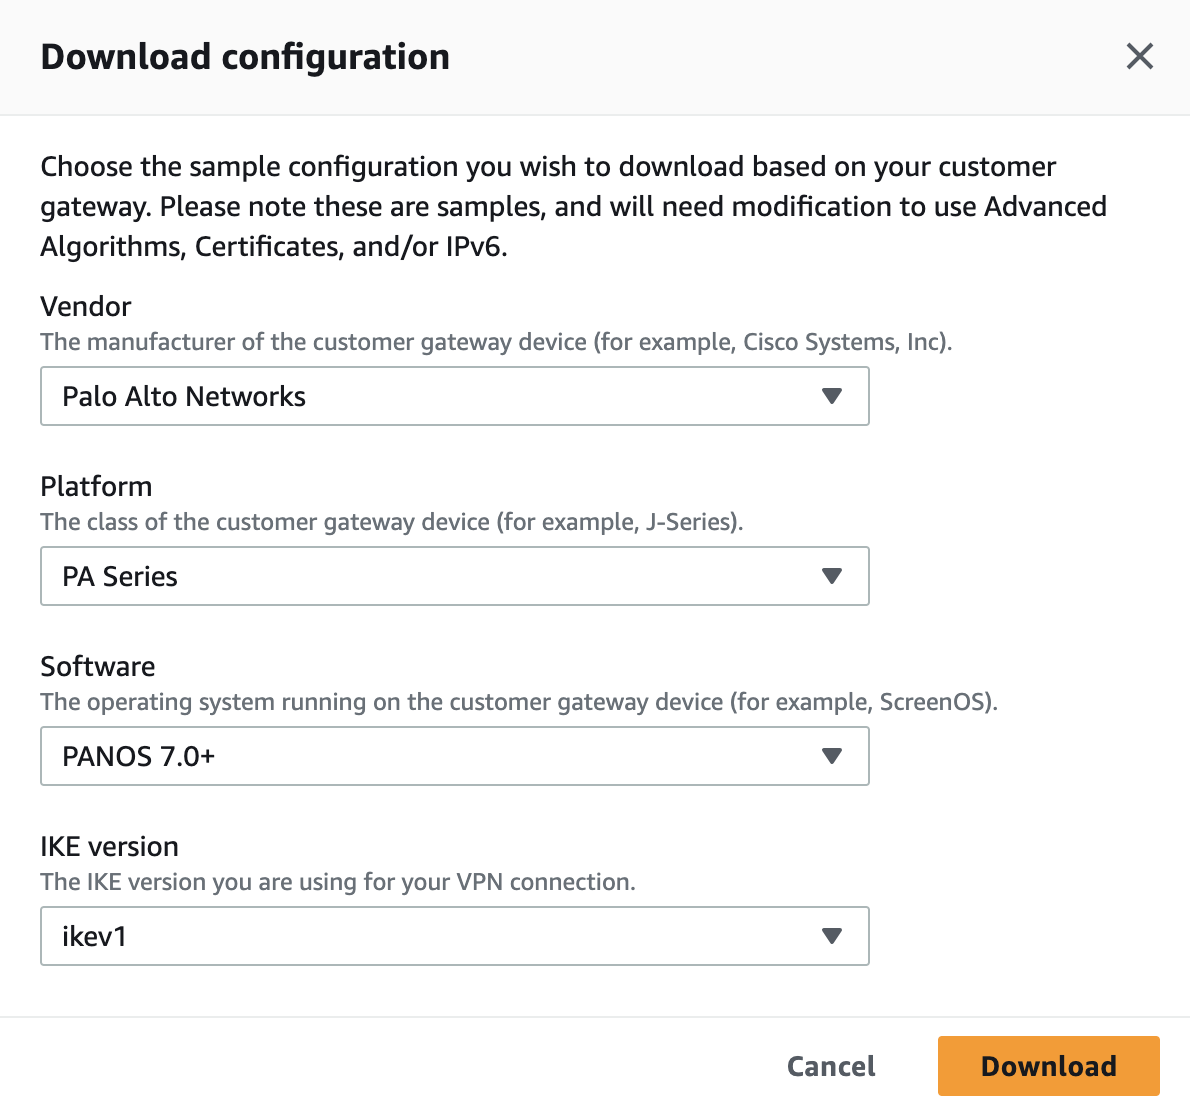
- Download the pre-shared key, and encryption/authentication settings in AWS.
Download AWS site-to-site VPN configuration for PaloAlto
Goto -> VPC -> Virtual Private Cloud-> Site-to-Site VPN connections-> Click your VPN -> Download configuration.
PaloAlto Site to Site IPsec VPN setup
The first step in the IPsec VPN tunnel creation is to configure the IKE crypto profiles and IKE gateway, IPsec crypto, IPsec Tunnel, and Security Profile.
Connect your Palo Alto management portal.
Create IKE Crypto Profile:
- Go to “Network” > “Network Profiles” > “IKE Crypto”.
- Create a new IKE Crypto Profile
- Configure the encryption algorithm, authentication algorithm, and lifetime values according to your requirements in AWS VPN configuration file. For Example,
edit network ike crypto-profiles ike-crypto-profiles vpn-3sd422be8f65d1dfd4-0
 set dh-group group2
 set hash sha1
 set lifetime seconds  28800
 set encryption aes-128-cbc
 top
It should be like this in the configuration.
- Add the name as vpn-3sd422be8f65d1dfd4-0
- Choose the DH Group as group2.
- Set the Authentication as SHA1.
- Choose the lifetime as 28800 seconds.
- Set the Encryption as aes-128-cbc
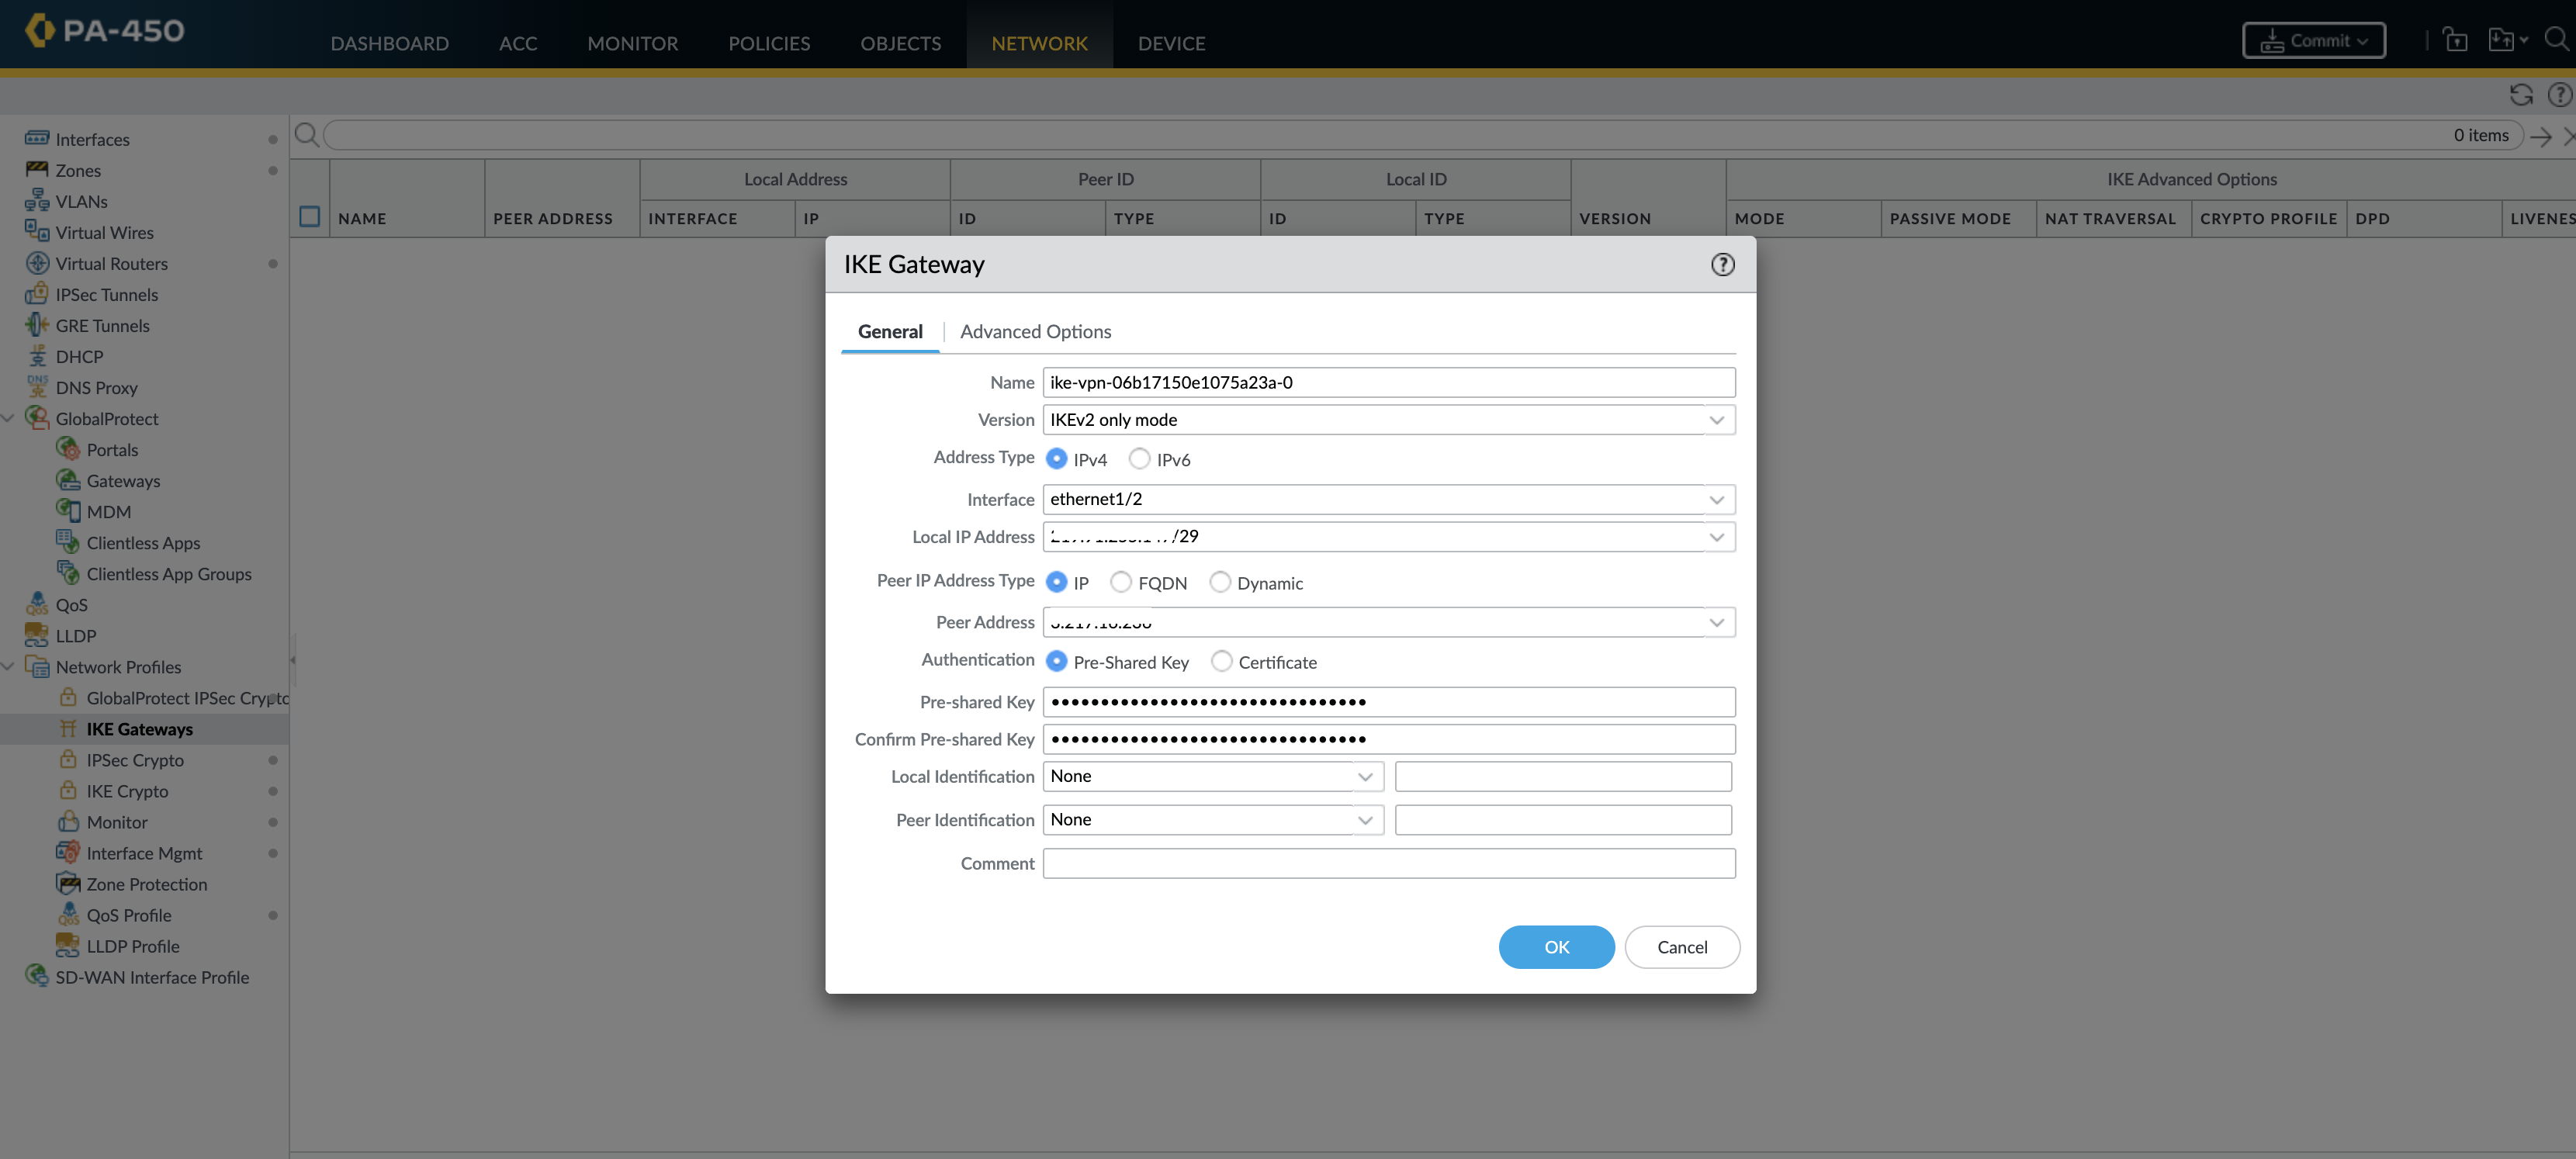
Configure IKE Gateway:
The details are available in the AWS VPN configuration file.
- Go to “Network” > “IKE Gateways” and click on “Add”.
- Provide a name for the IKE Gateway.
- Specify the local and peer IP addresses.
- Configure the pre-shared key, authentication method, encryption, and lifetime values.
Create IPSec Tunnel Interface:
- Go to “Network” > “Interfaces” and click on “Create New” to add a new tunnel interface.
- Configure the interface type as “IPSec Tunnel” and provide a name for the interface.
- Specify the local IP address and the virtual router to be used.
Configure IPSec Tunnel Parameters:
- Go to “Network” > “Network Profiles” > “IPSec Crypto”.
- Create a new IPSec Crypto Profile
- Configure the encryption algorithm, authentication algorithm, and lifetime values according to your requirements.
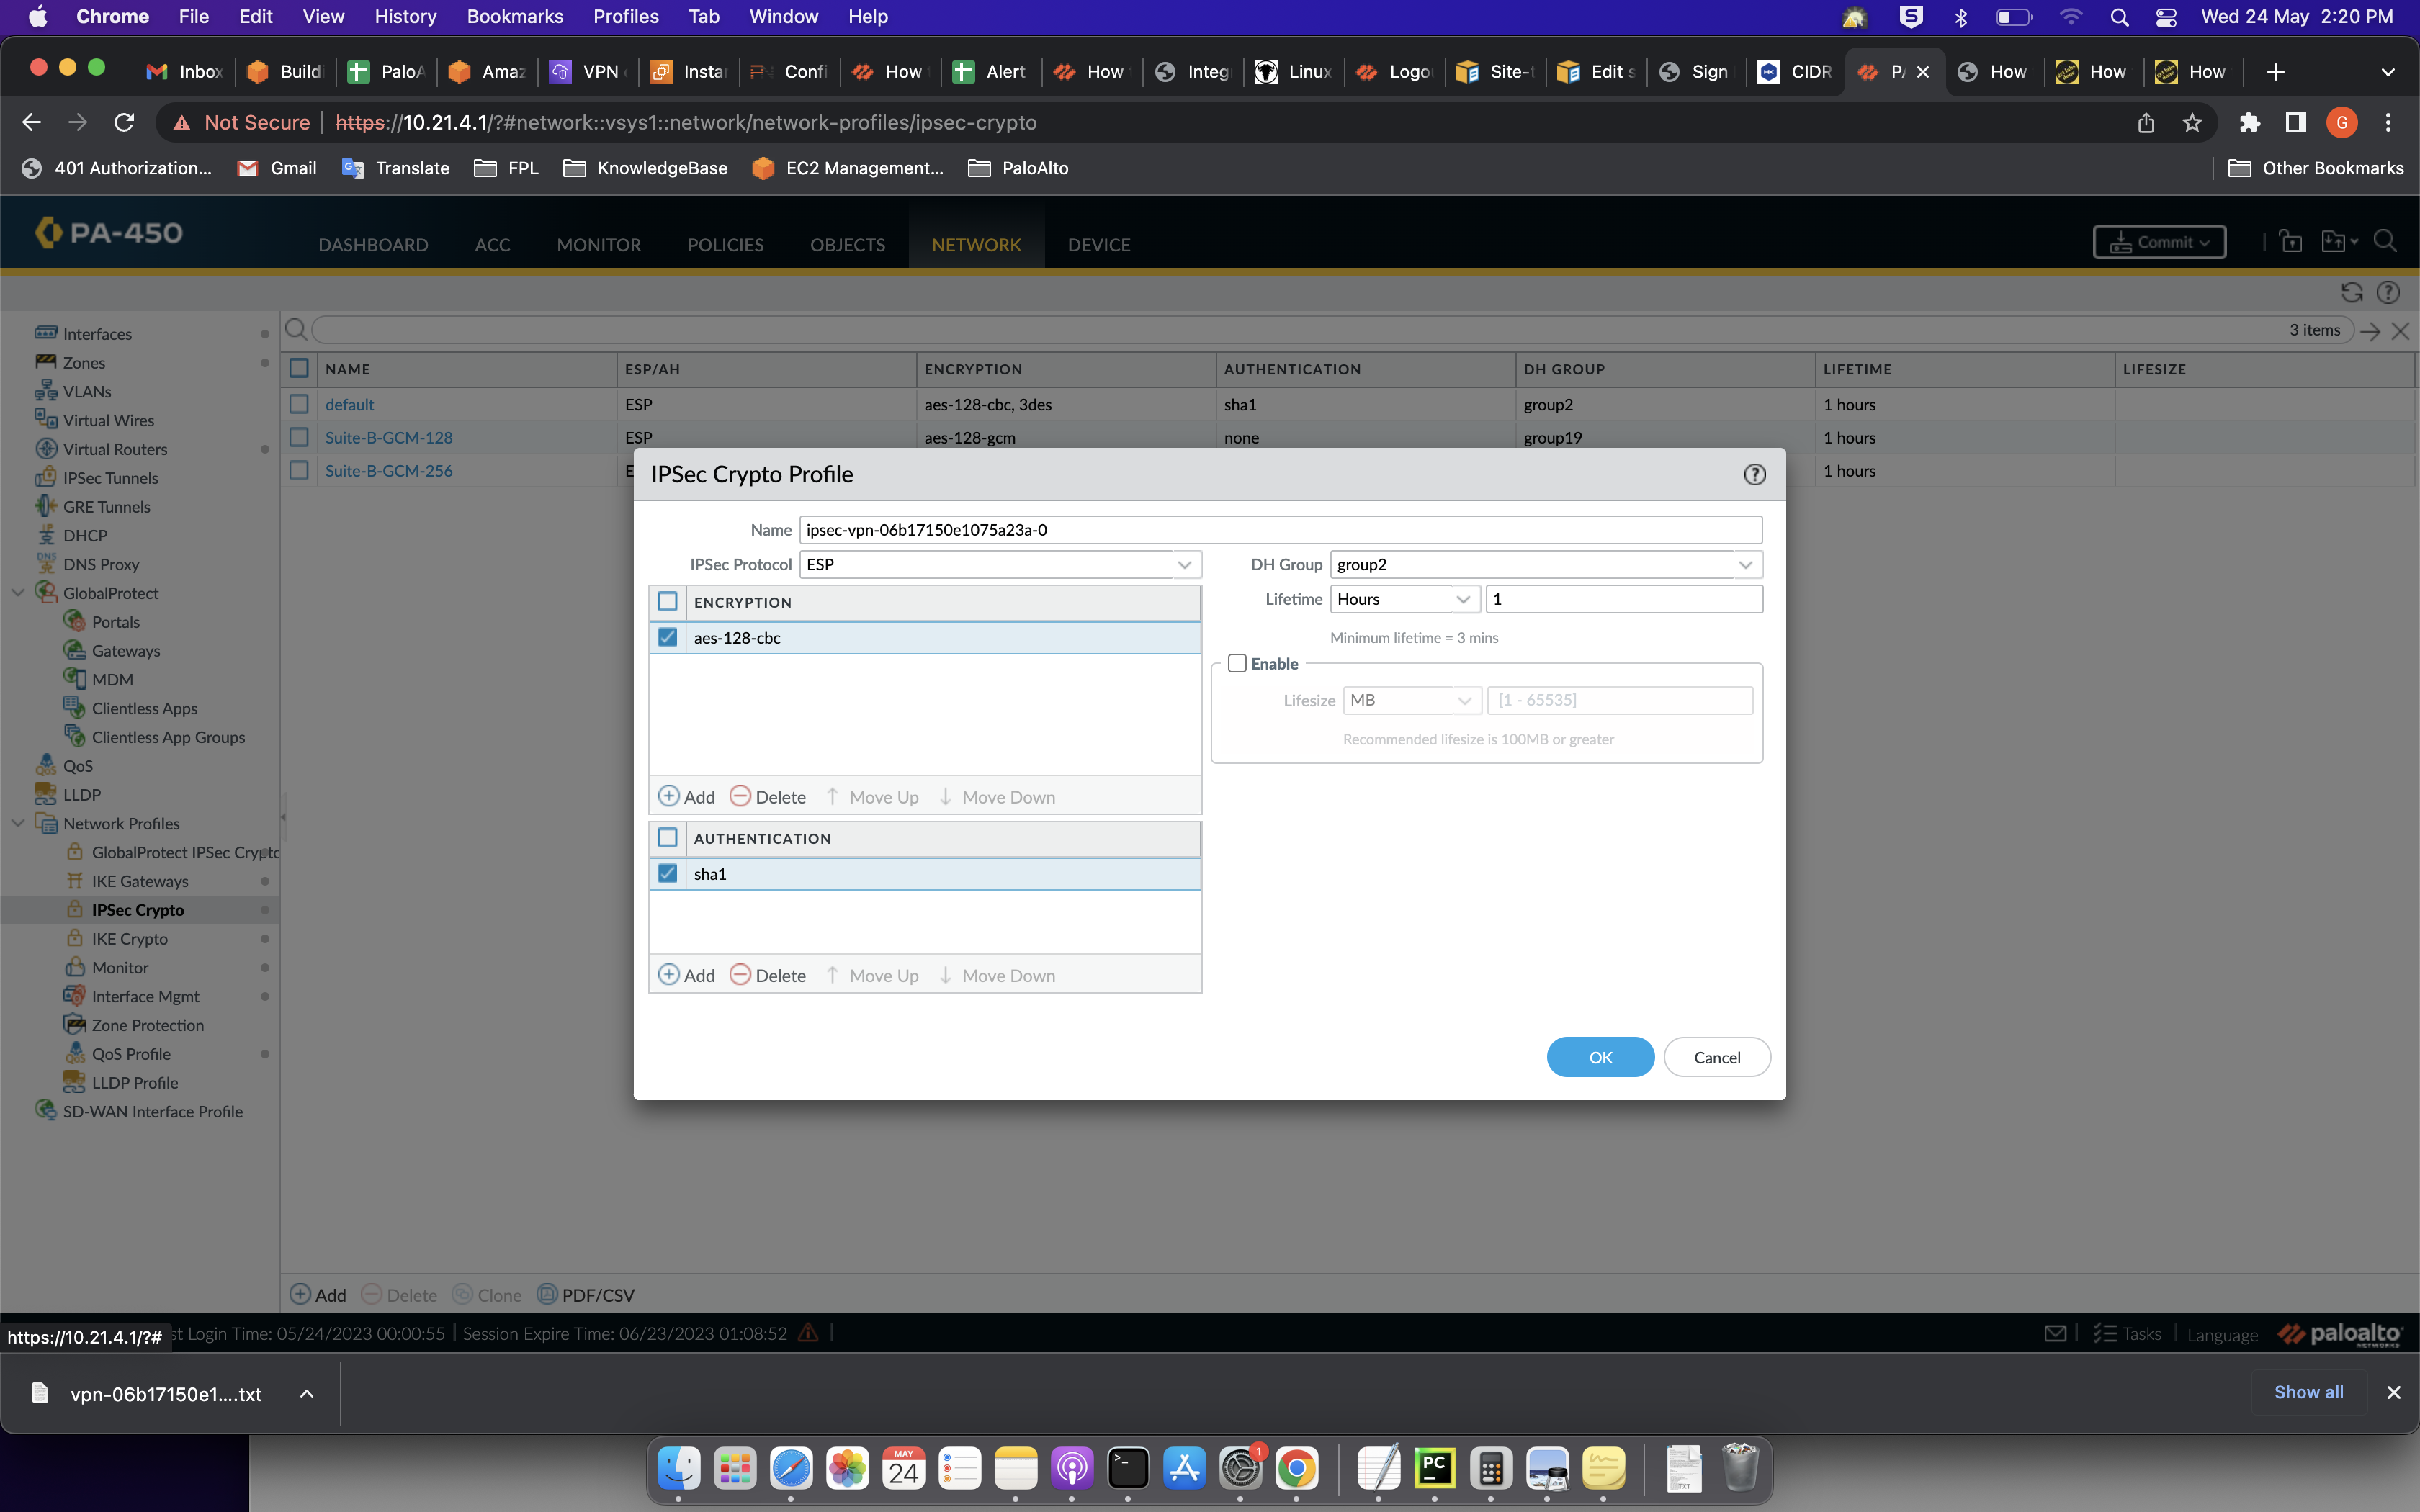
Example configuration in the file.
edit network ike crypto-profiles ipsec-crypto-profiles ipsec-vpn-068a2be8f65d1dfd4-0
 set esp authentication sha1
 set esp encryption aes-128-cbc
 set dh-group group2
 set lifetime seconds 3600
top
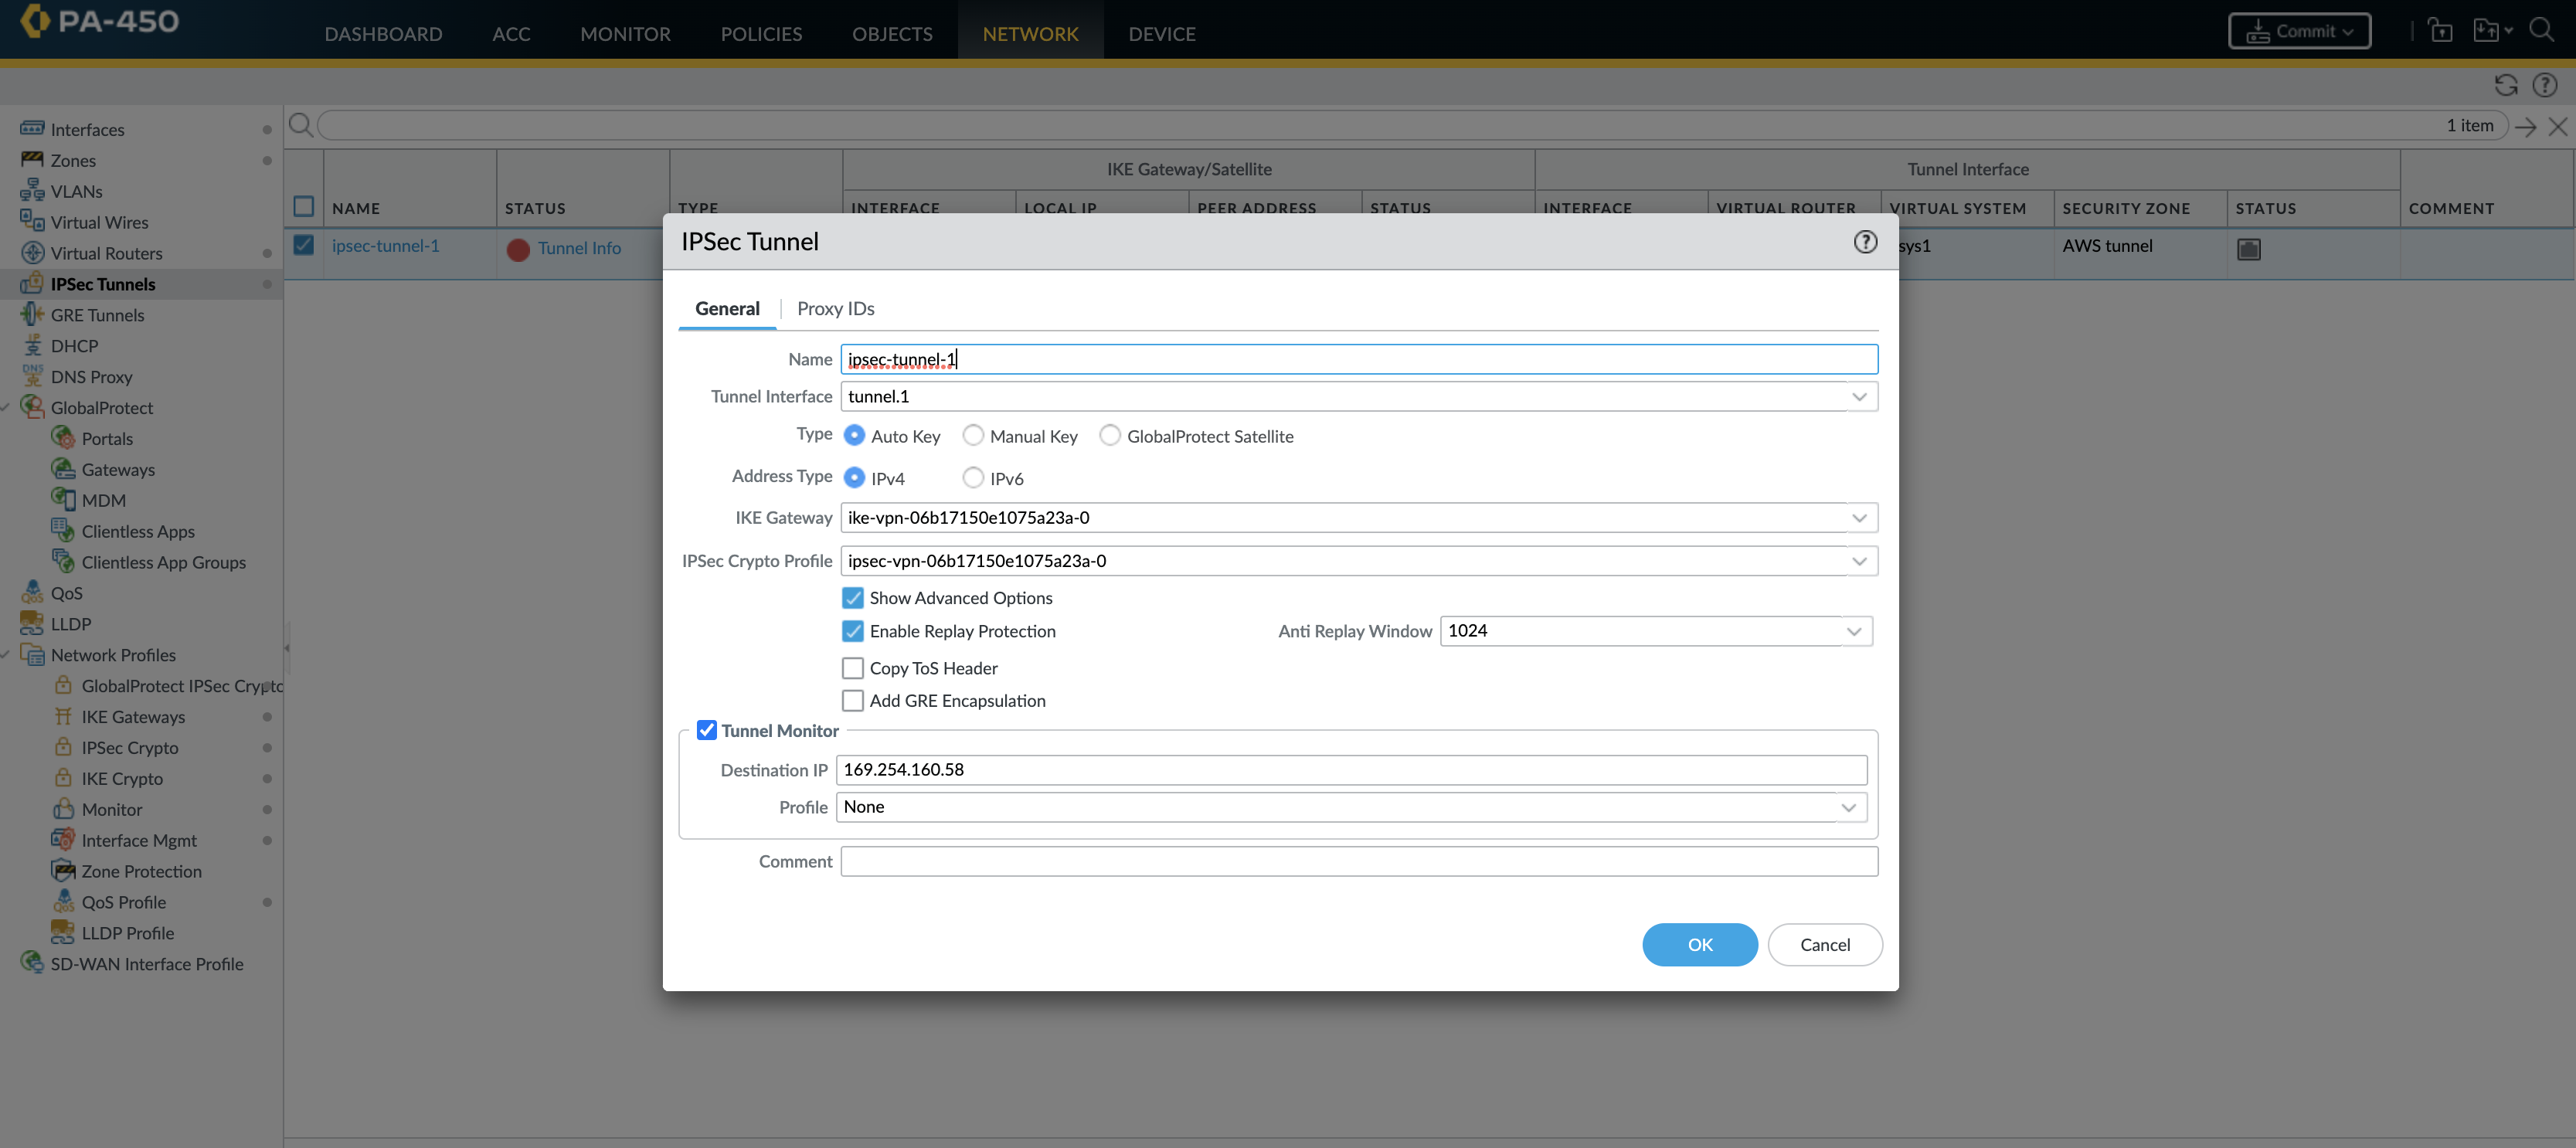
Create IPSec Tunnel:
- Go to “Network” > “IPSec Tunnels” and click on “Add”.
- Provide a name for the tunnel and select the tunnel interface created in step 2.
- Configure the local and peer IP addresses, along with the pre-shared key.
- Select the IPSec Crypto Profile created in step above
- Specify the local and peer encryption domains (subnets) that will be reachable over the VPN tunnel. ( create and configure the site to site VPN internal CIDR ip as interface (162.x.x.x) ip ( check in AWS 162.x.x.x./30, take that last ip to configure))
Configure Security Policies:
- Go to “Policies” > “Security” and create a new security policy.
- Configure the source and destination zones, addresses, and services.
- Specify the action as “Allow” and the VPN tunnel as the egress interface.
Creating Static Routes
Under Network > Virtual Routers, click Add
Add tunnel networks—> Click Static Routes -> Add Tunnel Interfaces

Verify and Monitor:
- Go to “Monitor” > “IPSec Tunnels” to view the status of the VPN tunnels.
- Verify the tunnel status, traffic statistics, and any error messages.
See both the Tunnel turned from RED to green.

Create the above steps for all the tunnels that you required from AWS.
Testing The Site-to-Site
Validate the SSH access to the AWS public and Private host.
These steps outline the basic configuration for Site-to-Site IPSec VPN on the Palo Alto Networks firewall. Make sure to adapt them to your specific network requirements and consult Palo Alto Networks documentation or support for further assistance.


