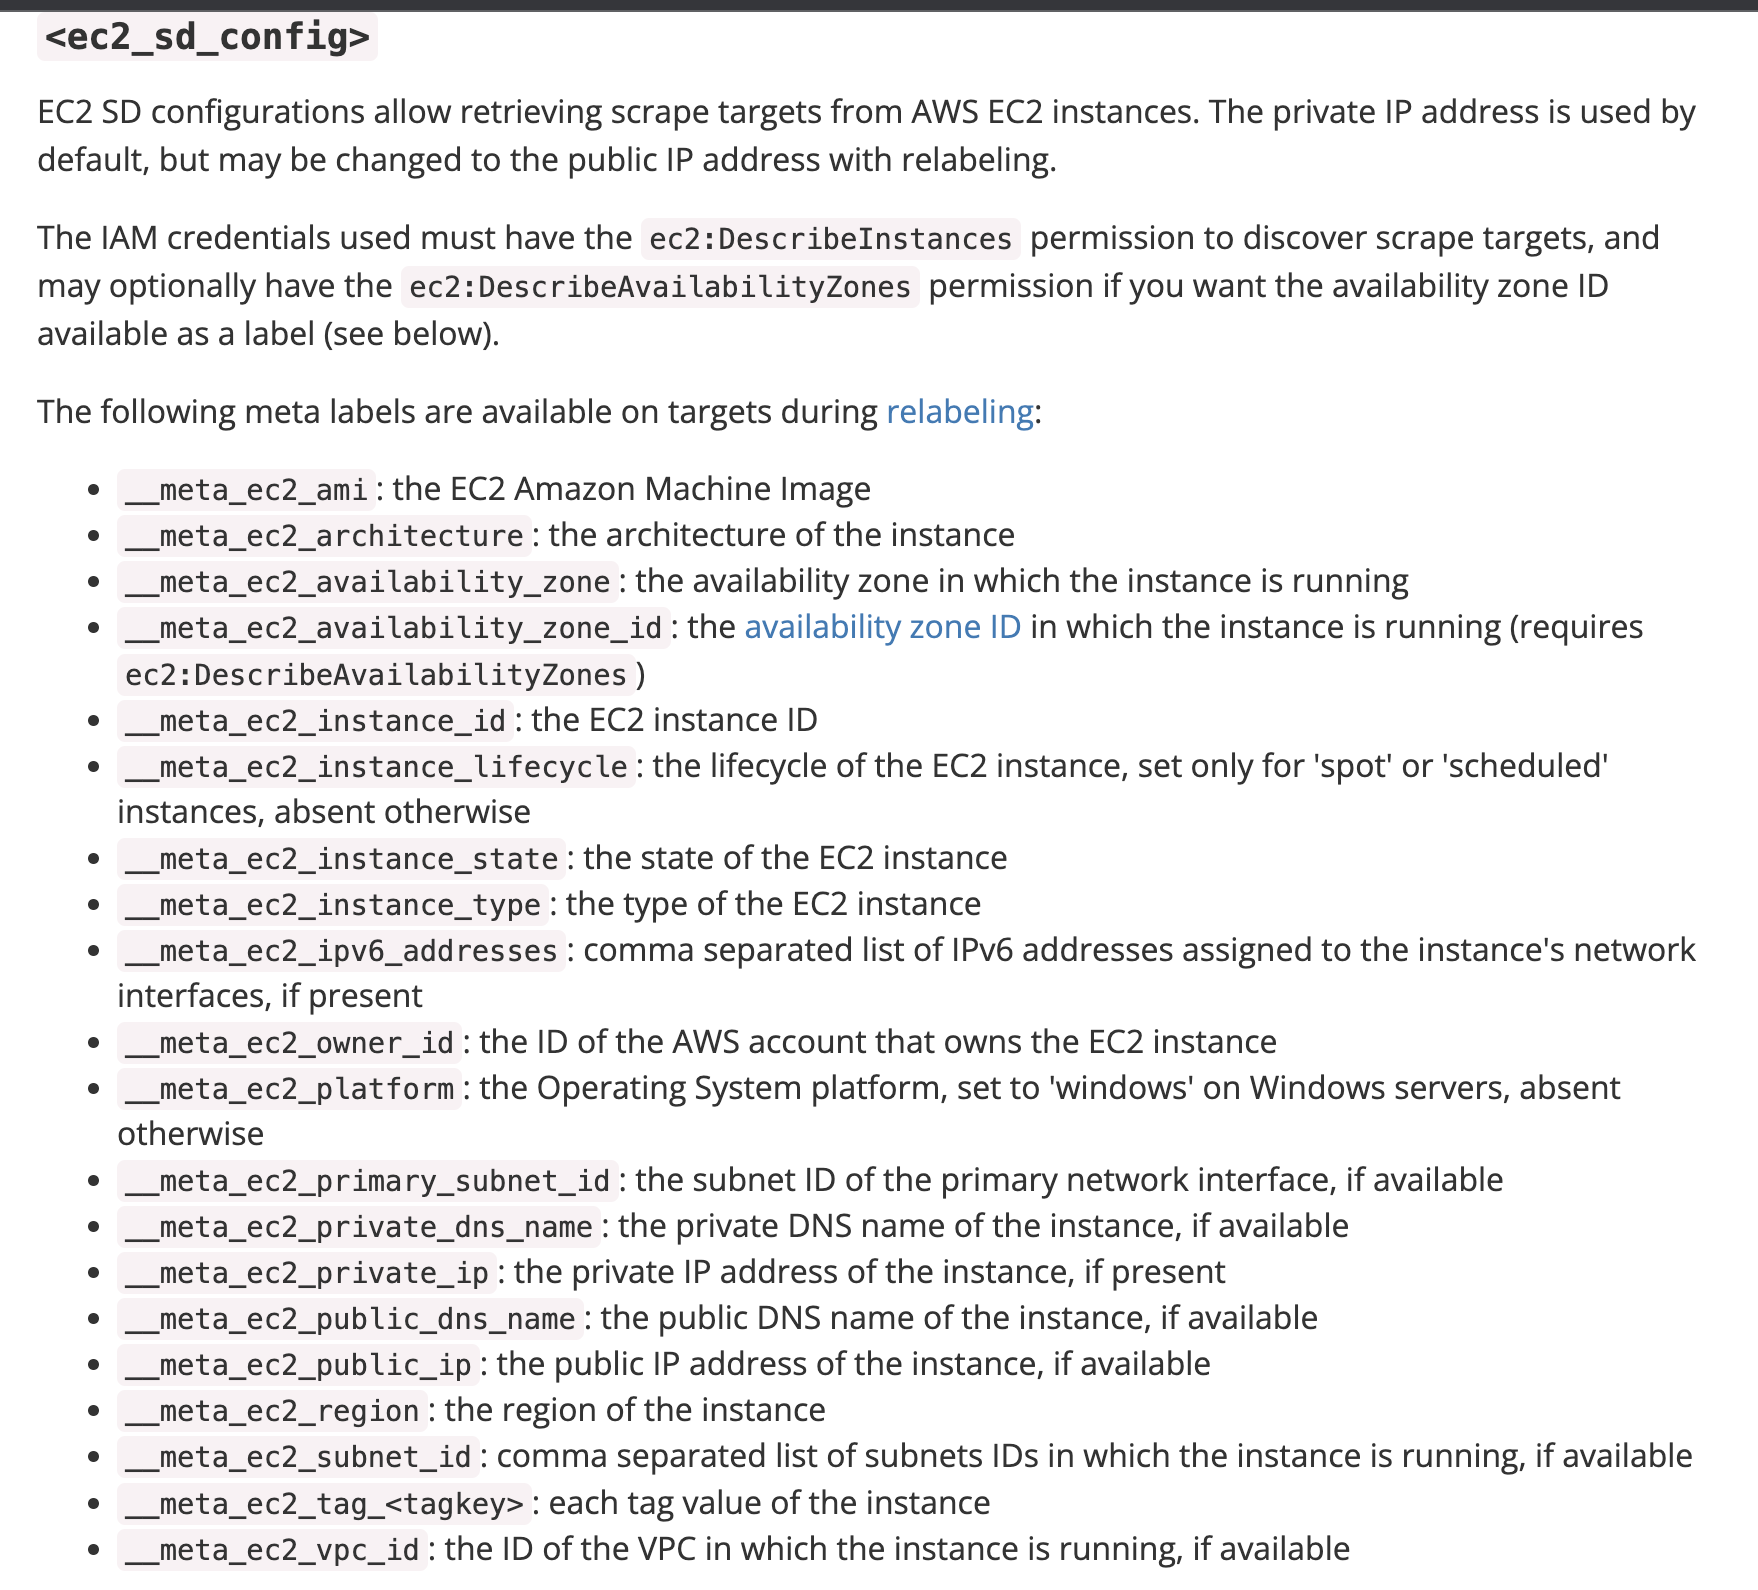
Prometheus monitor is allowing you to automatically discover all the EC2 instances through the node_exporter and monitor the metrics in one grafana graph. The Prometheus based discovery of AWS EC2 instances is very easy and ec2_sd_configs allow retrieving scrape targets.
Node exporter
It is a prometheus exporter for hardware and OS metrics exposed by *NIX kernels, written in Go with pluggable metric collectors. Install node_expoter and ensure the EC2 instances running with ports 9100 and 9090 were open in the Security Group.
How to configure AWS EC2 auto discovery in Prometheus
Create an IAM User
- First, select IAM from the AWS Services and Click Users from the sidebar menu.
- Click on Add user button
- Click user and Generate AWS access key and Secret keys

Save the generated keys in a safe place. It is really important to keep these keys in a safe place.
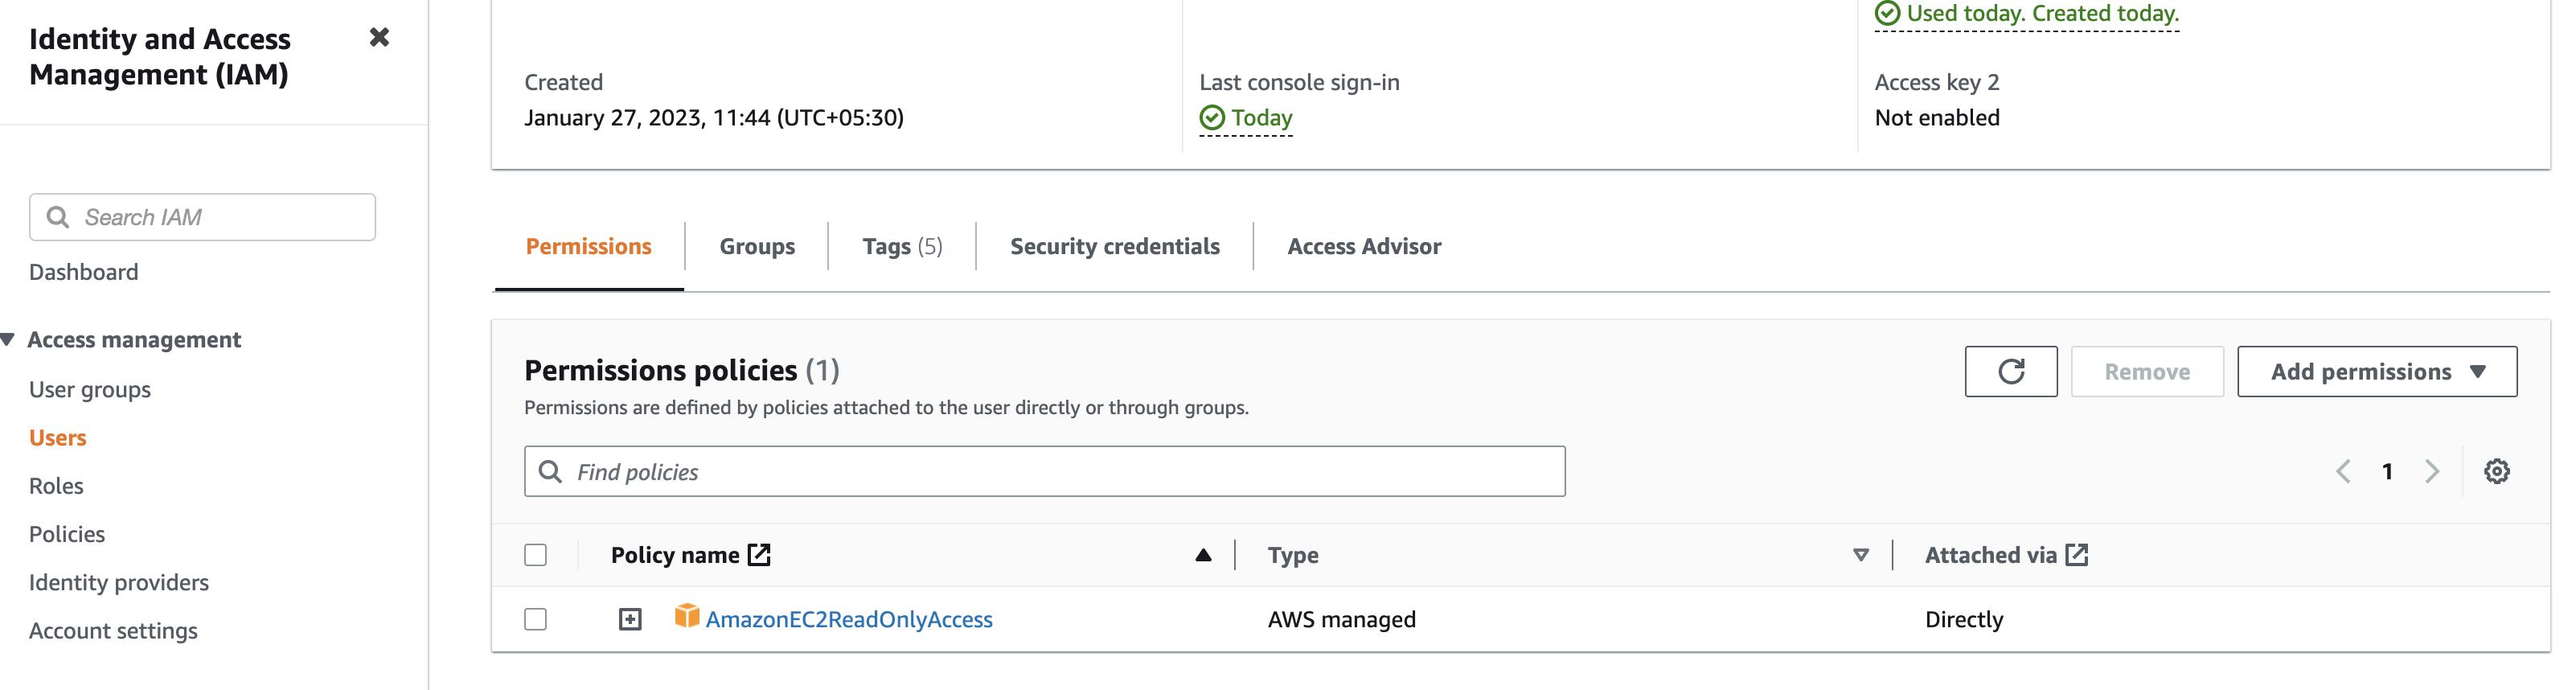
Setup Policy
Set permissions for the new user. At this point, the new user is not capable to do nothing. Attach an existing policy using the filter and looking for AmazonEC2ReadOnlyAccess.
Configure AWS EC2 Instance auto discovery
Now go to your prometheus server and updated the configuration file.
- Edit /etc/prometheus/prometheus.yml file and update the below settings in your existing scrap configuration.
scrape_configs:
  - job_name: 'nodeexporter'
    ec2_sd_configs:
      - region: ap-south-1
        access_key: PUT_THE_ACCESS_KEY_HERE
        secret_key: PUT_THE_SECRET_KEY_HERE
        port: 9100
    relabel_configs:
      - source_labels: [__meta_ec2_tag_Name]
target_label: instance- Reload your prometheus
curl -X POST <prometheus_host>:9090/-/reloadGo to your prometheus console > status > targets and all you discovered EC2 instances are registered and being scraped for metrics.
http://gopal-prometheus-metric-monitoring:9090/targets
Example configuration to fetch only the selected instances.
Relabelling gives you the power to customise what labels Prometheus applies to your target. For an example, to discover only the particular Tag name and label, I put the following into /etc/prometheus/prometheus.yml and reloaded Prometheus:
    relabel_configs:
    # Only monitor instances with a Name starting with “demo website”
      - source_labels: [__meta_ec2_tag_Name]
        regex: demo website.*
        action: keep
        # Use the instance ID as the instance label
      - source_labels: [__meta_ec2_instance_id]
        target_label: instance
How to discover EC2 metrics using fluent-bit agent?
Use the below simple steps to install Fluentbit and configurations.
# Direct curl command to install the agent

curl https://raw.githubusercontent.com/fluent/fluent-bit/master/install.sh | sh

# Move the existing configuration file and update the config with your custom port 2021 or IP address.

mv  /etc/fluent-bit/fluent-bit.conf  /etc/fluent-bit/fluent-bit.conf-$(date +'%d-%m-%Y-%s')
cat << EOF | sudo tee  /etc/fluent-bit/fluent-bit.conf
[SERVICE]
        flush 1
        log_level info


[INPUT]
        name node_exporter_metrics
        tag node_metrics
        scrape_interval 2


[OUTPUT]
        name prometheus_exporter
        match node_metrics
        host 0.0.0.0
        port 2021
EOF
# systemctl restart fluent-bitYou are almost done. Go back to the top and follow the prometheus configuration /etc/prometheus/prometheus.yml file.


