There is an option to extend the Root volume size and Block volume size in Oracle cloud infrastructures. Use below steps to increased the Oracle cloud Instance Root Volume size in Linux.
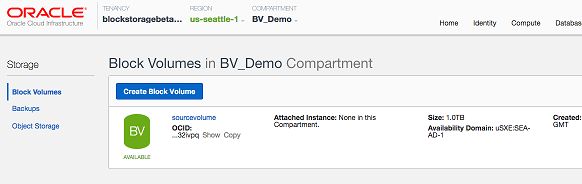
Oracle Instance boot volume
How to Increase the Oracle Cloud Instance root volume size
Step1:
- Login your Oracle Cloud console.
- Stop the instance
- Detach the boot volume
- Open the navigation menu. Under Core Infrastructure, go to Compute and click Boot Volumes.
- In the Boot Volumes list, click the boot volume you want to resize.
- Click Resize.
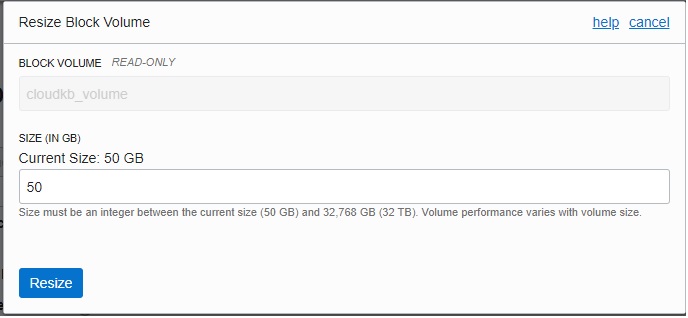
Oracle Instance root volume resize
- Specify the new size and click Resize.
– You must specify a larger value than the boot volume’s current size.
Step2:
This is required to attach the volume to the new instance as an additional disk and Extending the partition size. Attach the boot volume to a second instance as an additional data volume.
- Extend the partition and grow the file system.
How to Extending the Root Partition on a Linux Instance.
After attaching the boot volume as an additional data volume to the second instance, connect to this instance and perform the following steps to extend the partition.
Run the following command to list the attached block volumes to identify the volume you want to extend the partition.
# lsblk
Run the following command to edit the volume’s partition table with parted
parted <volume_id>
<volume_id> is the volume identifier, for example /dev/sdc.
When you run parted, you may encounter the following error message:
Warning: Not all of the space available to <volume_id> appears to be used,
you can fix the GPT to use all of the space (an extra volume_size blocks)
or continue with the current setting?
You are then prompted to fix the error or ignore the error and continue with the current setting. Specify the option to fix the error.
Run the following command to change the display units to sectors so you can see the precise start position for the volume:
(parted) unit s
Run the following command to display the current partitions in the partition table:
(parted) print
Make note of the values in the Number, Start, and File system columns for the root partition.
Run the following command to remove the existing root partition:
(parted) rm <partition_number>
<partition_number> is the value from the Number column.
Run the following command to recreate the partition:
(parted) mkpart
At the Start? prompt, specify the value from the Start column. At the File system type? prompt, specify the value from the File system column. Specify 100% for the End? prompt.
Run the following command to exit parted:
(parted) quit
This command forces a rewrite of the partition table with the new partition settings you specified.
Run the following command to list the attached block volumes to verify that the root partition was extended:
# lsblk
After you extend the root partition you need to grow the file system.
The steps in the following procedure apply only to xfs file systems.
# xfs_repair <partition_id>
<partition_id> is the partition identifier, for example /dev/sdc3. See Checking and Repairing an XFS File System for more information.
# xfs_growfs -d <partition_id>
<partition_id> is the partition identifier, for example /dev/sdc3.
Run the following command to display the file system details to verify that the file system size.
# df -lh
Step3:
Once you have extended the partition and grown the file system, you can restart the original instance with the boot volume.
- Disconnect the volume from the second instance.
- Detach the volume from the second instance.
- Attach the volume to the original instance as a boot volume.
- Restart the instance.
Errors :
If you are getting the following error and unable to increase partition size, use growpart, fdisk to increase it.
Partition number? 3
Error: Partition /dev/sda3 is being used. You must unmount it before you modify it with Parted.
Fix:
Method1: Use growpart to increase.
# sudo growpart /dev/sda 3
# sudo xfs_growfs /dev/sda3
Method2: Use fdisk to increase.
[root@oracle_cloud ~]# fdisk /dev/sda
WARNING: fdisk GPT support is currently new, and therefore in an experimental phase. Use at your own discretion.
Welcome to fdisk (util-linux 2.23.2).

Changes will remain in memory only, until you decide to write them.
Be careful before using the write command.


Command (m for help): d
Partition number (1-3, default 3):
Partition 3 is deleted

Command (m for help): n
Partition number (3-128, default 3):
First sector (34-419430366, default 17827840):
Last sector, +sectors or +size{K,M,G,T,P} (17827840-419430366, default 419430366):
Created partition 3


Command (m for help): w
The partition table has been altered!

Calling ioctl() to re-read partition table.

WARNING: Re-reading the partition table failed with error 16: Device or resource busy.
The kernel still uses the old table. The new table will be used at
the next reboot or after you run partprobe(8) or kpartx(8)
Syncing disks.
[root@oracle_cloud ~]# sudo xfs_growfs /dev/sda3
meta-data=/dev/sda3 isize=512 agcount=4, agsize=2495232 blks
= sectsz=4096 attr=2, projid32bit=1
= crc=1 finobt=0 spinodes=0
data = bsize=4096 blocks=9980928, imaxpct=25
= sunit=0 swidth=0 blks
naming =version 2 bsize=4096 ascii-ci=0 ftype=1
log =internal bsize=4096 blocks=4873, version=2
= sectsz=4096 sunit=1 blks, lazy-count=1
realtime =none extsz=4096 blocks=0, rtextents=0
data blocks changed from 9980928 to 50200315